Last Updated on September 28, 2015 by Chef Mireille
At one time, blogging was just a hobby. However, that has changed and many people turn blogging into an income generating career via sponsorships, advertising, books and a myriad of services. This is a journey I have been on for quite a while and I read lots of tips from other successful bloggers. But I think food blogging creates a unique set of circumstances. Many of what I read can be adapted to general bloggers of what is called lifestyle bloggers, but really isn’t going to work for a food blogger.
Although income from the blog is starting to trickle in, I still have a long way to go. In order to share this knowledge I have learned along the way, I am planning on starting another blog about the business of blogging…but just for food bloggers! In the meantime, this week’s BM theme was Blogger’s Choice, so I am sharing some tips I have learned along the way and I hope it helps.
The first tip and really I call it a rule and I think it is the most important rule to become a successful blogger ~
DON’T COMPARE YOURSELF TO OTHERS
This will just lead you down a road of depression, leaving you less motivated and inspired. Trust me, I’ve been there! Everyone has their own learning curve and their own unique set of circumstances. Just keep on learning and working and celebrate every little achievement. If you receive 2 comments on a post and before you weren’t getting any comments, celebrate it. Treat yourself with a manicure or is a red velvet cupcake your guilty pleasure? Who cares if you visit a similar blog and they have 100 comments on a similar post. Maybe they have a SEO expert at home helping them. Maybe they have someone supporting them so they don’t need to work full time while growing their blog. As long as you are making progress and getting more followers and engagement, then you are being successful!
Now that you aren’t comparing yourself to anyone, this week I will be showing you step by step tips to help you streamline your social media processes. Now this is not easy as it is VERY TIME CONSUMING – Do I do everything I preach? – No because I just can’t find enough hours in the day, but at least set goals and aim to achieve them. It’s ok if you are a few days behind after the actual post – However, if you don’t set the goal it will never get done but with the goals set, you know you have to get to it…eventually…
I once read from a successful blogger who made her blog into an income generating source within one year that your blogging time should be divided 50/50 between developing/posting recipes and social media. I think very few of us do this!
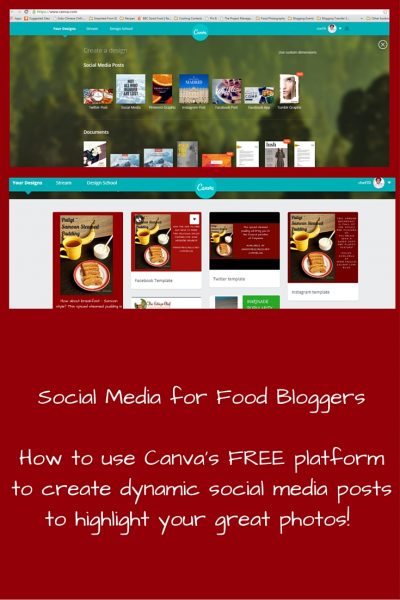
As a food blogger, photos are one of the most important things for us. Our photos need to represent our food in the best possible way and those photos need to come across social media so that the reader can easily view the gorgeous photos no matter which social media platform they are reading. Today I am introducing you to Canva. Canva is a free website that allows you to create banners for your social media platforms, social media posts and other postings – all formatted for you so that it’s the perfect size for each platform.
FREE: They have both paid and free templates. Choose free templates and it won’t cost a cent!
HOW TO SIGN UP: Create a username and password. That’s it!
WHY TO USE: Sure create great headers for all your social media platforms. However the most useful reason to use Canva is to create posts the right size for all your social media platforms. This way when someone sees the photo on twitter, they are not getting dead space of the photo in their Twitter feed.
HOW TO USE: Create a template for each social media network. You only have to do that once. After you’ve created the template, just change the photo and text for each post and you’re done.
Here are the step by step instructions to create an Instagram template.
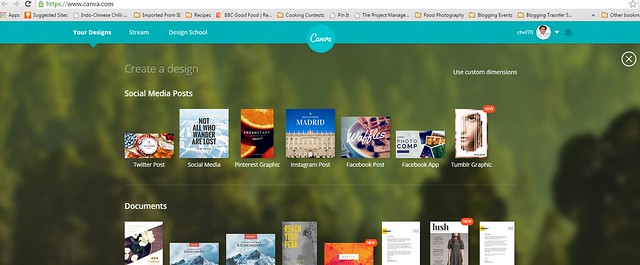
Step 1: Select Instagram post.
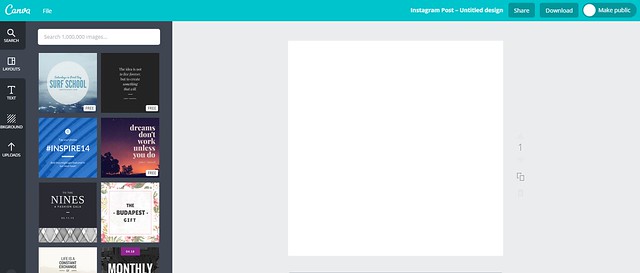
Step 2: Choose a free template.
Step 3: Click on BACKGROUND on the sidebar. Use the color wheel to select your background color. Choose a color that is similar or the same as the color themes of your blog.
Step 4:
Click on the text and change font, color and size as you desire.
Step 5:
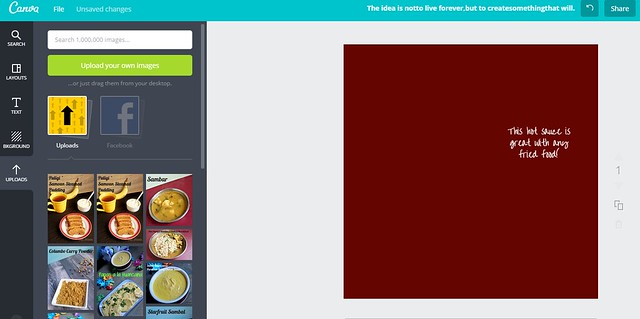
You can also select TEXT from sidebar and choose specialty text boxes. Alternately you can add a text box to add the text on top of the photo. Here I selected Add a little bit of body text.
Step 6:
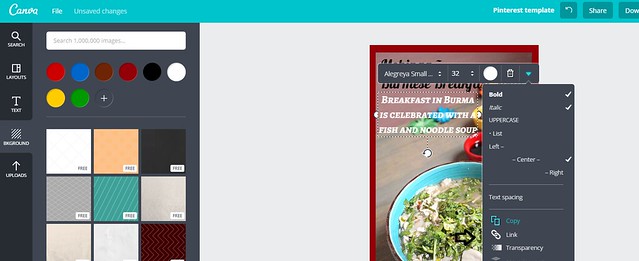
Click on the drop down of the text box to change to italics or bold, as well as linking the text to your post, if desired.
Step 7:
Select any additional elements and text from the template and discard by clicking on the trashcan icon.
Step 8:
Click on UPLOADS on the sidebar and upload your images from your computer.
Step 9:
Once the photo is uploaded, just click and drag it into the template.
Step 10:
Edit the text as you desire. Resize any elements as necessary. Click on the upper right to rename the template. Call it Instagram Template.
https://www.flickr.com/photos/132661972@N04/21442162190/in/dateposted-public/
Step 11:
Save it. Once you save it, the template will be available to you every time you log into Canva.
Step 12:
Download it as jpg.
Do the same thing for Pinterest, Twitter and Facebook. Save them and they will be in Your Designs. You now have an easy template to edit for each post.
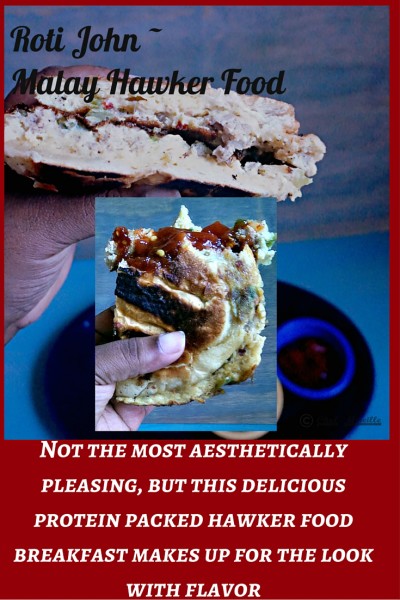
This introduction was a guide to help you get comfortable with Canva. There is so much more you can do like create Infographics or do photos within photos like I did here:
I once read that it is good to have all your photos look the same, so that whenever anyone sees the style of the photo people will automatically be able to know it’s yours. Well I’m a Gemini and bore easily, so periodically I change my backgrounds as I get bored. So I don’t have the personality to always have black backgrounds or white backgrounds or have the same style in every photo. However, by publishing my posts to social media using these templates, the photos now look the same across social media, but with a style that is unique to me. So hopefully as soon as people see the photo, they’ll say :”Oh that’s the Schizo Chef. Her recipes are always so interesting. I’ll visit the site and see what country she’s visiting today!” – I can dream right!
Now you’ve created all these great photos for social media posts. How do you streamline the posting process. Tomorrow, I’ll be showing you how to do that using another FREE website. So don’t miss tomorrow’s post!
Check out the Blogging Marathon page for the other Blogging Marathoners doing BM# 56
[inlinkz_linkup id=533225 mode=1]








Off course you can dream and I am looking forward to your tomorrow’s post. I know what you are going to talk about.. 🙂 I singed up for Canva and played around a bit. Nothing for the blog though. I will leisurely look into it after this marathon is over. Thanks for sharing.
That is one informative post .I shall try to find some time and look into the Canva.Looking forward to see your tomorrow’s post and that other blog.
I was just about to say of course you can dream and I am sure those dreams will happen, I read Usha saying the same..:)..very useful post..I like Canva and have used it for creating logos..Yet to try my food pictures in it..thanks for the great post..and looking forward to your new blog
I love canva. The social media tips that you give are awesome. I use buffer and also sumo me. Thanks a lot. Looking forward to other two tips.
Very useful & informative post. Talking about dreams to me, i’m big dreamer, hope our dreams will come true soon. Inspiring writing.Well done.
Very very useful post Mir. Learnt a lot of things today. 50/50 time on the blog and social media sounds almost impossible to me but come to think of it, that is probably how people really get to know about the blog. Canva seems easy to work with, will take a look into it.
An interesting and useful information, excellent.
An interesting and informative post, excellent.
Feel like using canva to highlight the pictures, again an informative post Mir.
This is an excellent post, and I will definitely come back to read details and check Canva again.
yep interesting and great info
Thanks a lot Mir. Now it all makes so much sense to me 🙂
you are welcome – Once you start, you will find it super user friendly
Mir thanks. Checking you tomorrow’s post.
your welcome. I hope you find it helpful!